Mid Server
To import data from My SQL server into service now we can use MID Server and Data source. MID Server is required when we need to access on premises data(i.e when machine/any server is in Virtual Private Network)
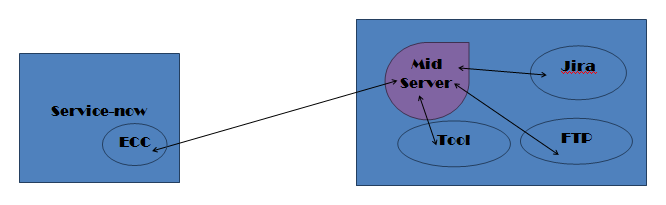
Mid Server is a Java application, through which Service-now can communicate with external applications which are running in Clients VPN i.e. Virtual Private Network.
Mid Server need to install in Clients Network to get or send data to Clients tool which are in their VPN.
We used MID server here because client MySQL server is in VPN, so installed the mid server in client VPN and same mid server we are using in data source.
ECC Queue -
Mid Server talks with service now using ECC (External Communication Channel).
Mid Server Script Include:
Mid Server Script Include, are the script, which we will execute on Mid Server
For example
1. If we need to connect with jira tool which is in VPN to create a ticket in JIRA and update the response which we are getting from jira into service-now ticket.
2. We need to create a Mid Server script include(Java code) , which will run on the Mid server, which will call the jira web service to create a ticket and take the response and the same response will send to service now table as an update by calling service now web service.
3. After creating mid server script include, we need to create a record into ecc queue against the specific mid server so that script will execute on that specific mid server.
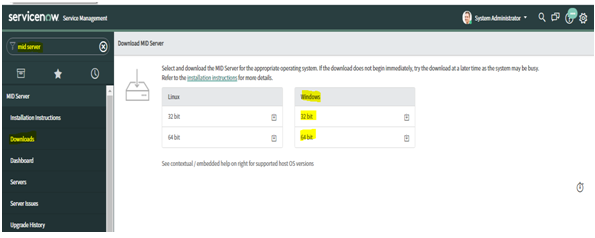
Mid Server Installation Steps -
- Download mid server from service now instance from left navigation menu.
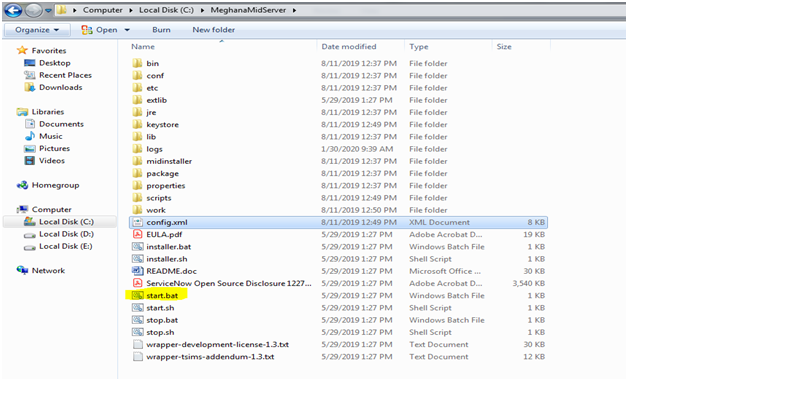
- Create one folder("MeghanaMidServer ") in C drive and extract the downloaded ZIP (MID Server setup) in this folder.
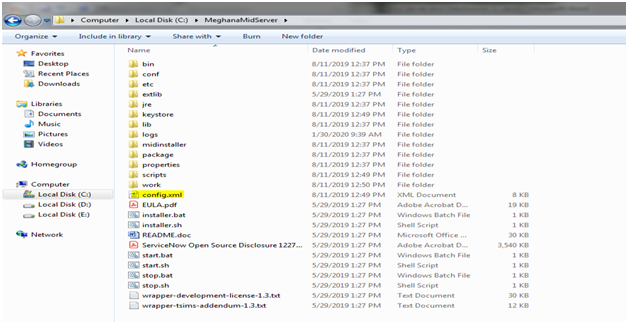
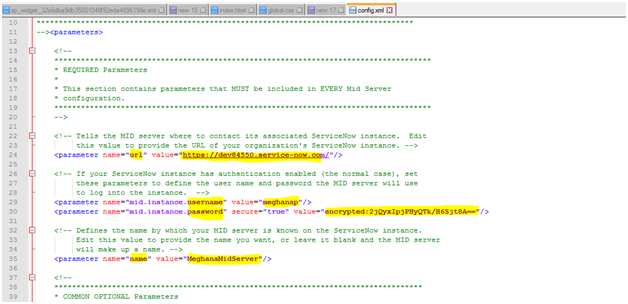
- Open “config.xml” file and configure ServiceNow instance details along with newly created user with “mid_server” role and mentioned MID server name as “MeghanaMidServer”(This name will appear in ServiceNow once we done with setting and mid server started).
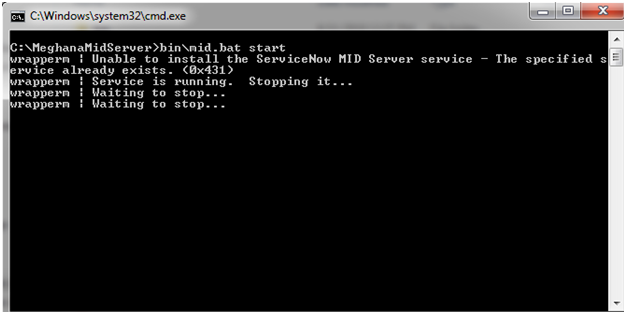
- Once done with all configurations start midserver by running start.bat file
- Once the above configurations and observations are fine, and then check in whether our mid server is appearing and with status “UP” or not.
- Go to service now instance->MID Server->Server = MeghanaMidServer
check its status and validate it(Validation means service now instance version and mid server instance is same).

Datasource
Create New Data Source:
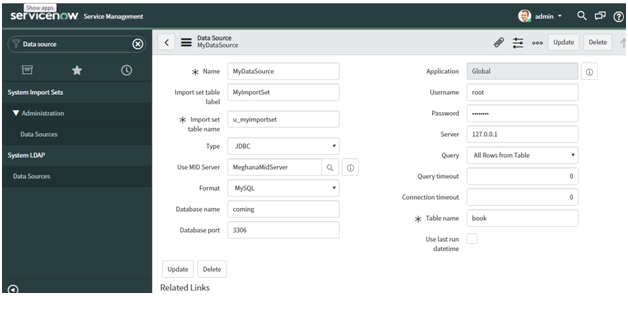
Name - Name of data source
Import set table label - Provide any label for import set
Import set table name - New import set will be created with this name
Type - Select type of data source (JDBC,FILE,LDAP etc)
File JDBC LDAP OIDC
Use MID Server - Specify name of the mid server to which we need to connect from service-now
MeghanaMidServer
Install XAMPP server on your machine.
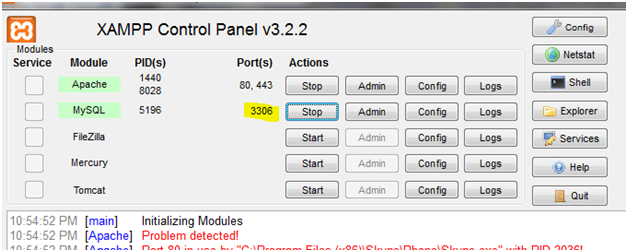
Start MySQL server - it will list port number.
Format - Specify data source format(MySQL,Oracle, SQL Server)
-- None -- MySQL Oracle SQLServer
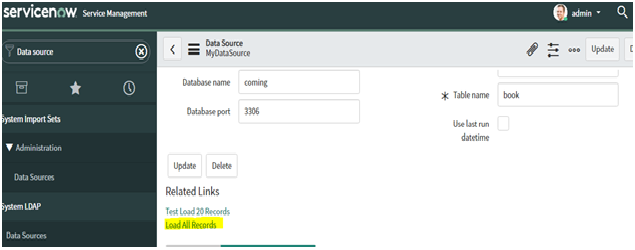
Database name - Create database in any db server(Created in MySQL server) and specify that db name here
Database port - Use db port number shown on XAMPP control panel against MySQL
Username - Specify MySQL server user name and password
Password
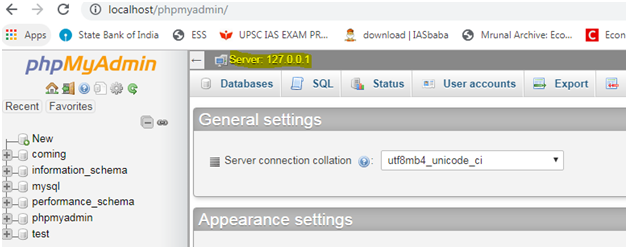
Open link -
http://localhost/phpmyadmin/
It will show you local host server address, use that address here.
Server
Query - It will query on table in such a way that it will return all rows from table, or we can write specific SQL (Select required fields or add filter conditions)
All Rows from Table Specific SQL
Table name - This table should be present in database.
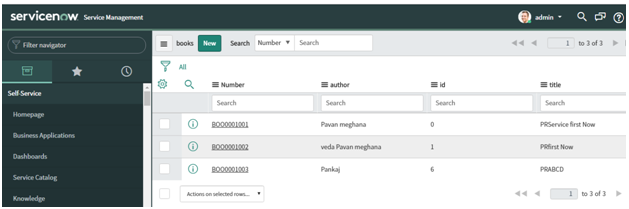
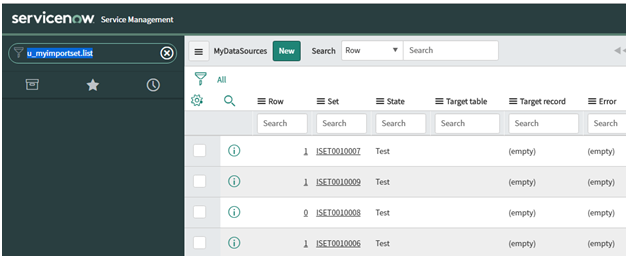
Import Set
Click on Load All Records - It will load all the records from specified table(book) into import set(u_myimportset).
Verify data in import set from left navigation.
Transform Map -
To dump/ transform import set data into table, we need to create target table first. Create new table(book) from left navigation. add required fields (id,title,author) those are in MySQL db table.
From left navigation go to transform map

Name - Specify name for new transform map
Source table - Select import set
-- None -- Computer [imp_computer] Import Incident [u_import_incident] Location [imp_location] MyDataSource [u_myimportset] Notification [imp_notification] User [imp_user]
Target table - Select table book in which we need to insert data
Filed Mapping - Perform mapping of import set filed with actual table
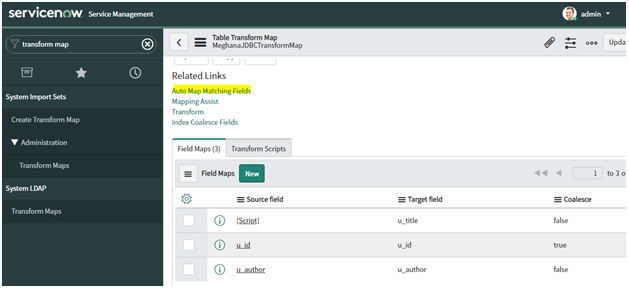
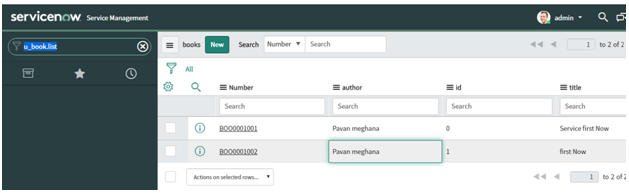
Click on transform - check the data is loaded in book table. here we are manually transforming import set data into table. but to automate this task we can use schedule job.
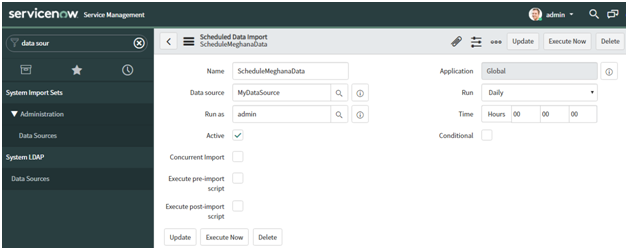
Schedule Job :
Go to your data source from left navigation -> configure-> Related list-> add Scheduled Data imports
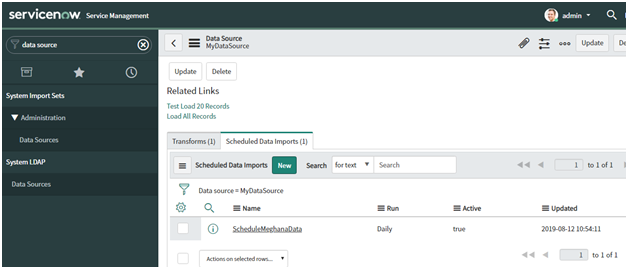
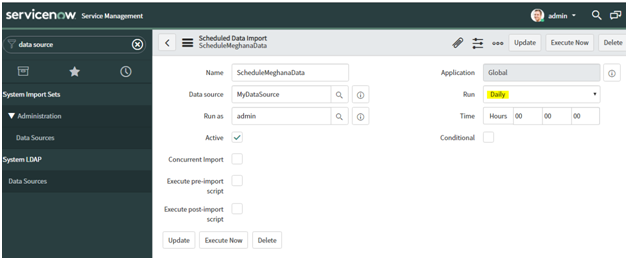
By selecting Run = Daily, This will transform data daily from data source into import set table.
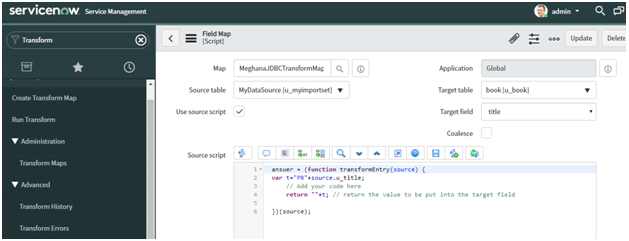
Source Script -
Open filed map - > select any filed
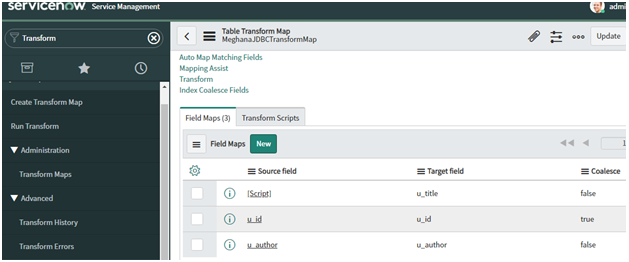
Click on Use source script checkbox -> it will allow you to run any script on this filed, before inserting data into target table.
In following example script, we are adding PR as prefix to the title.
Execute schedule job to load newly added data from my sql table to target table
Check Prefix PR is added in title